Saturday, March 10, 2012

Break For Thanks ~ New Series!

Ok so here goes the start of a new series! I am calling "Break For Thanks." I was inspired to write posts about what I'm thankful for by my friend Maci over at The Peaceful Nest. I think it is good set a time aside to reflect on all the blessings in my life. God has given me so much, and this will be a place to publicly thank Him for that.

This week I am thankful for my new job. It may sound silly at first, but finding this new position was HUGE for me. Re-wind eleven months ago when Mark and I first made the move to San Jose. I thought it would be fun to work in an optometry office instead of ophthalmology. My main reason for doing this was I wanted to learn about glasses (something I had NO experience in). I was fortunate enough to find a position at a great office. They were willing to train me from scratch, and I did learn quite a bit. What I didn't expect was how much "retail" was involved in the job. I do not like being a salesperson and that's exactly what I was. The other tough thing was I was constantly getting off at 7:15pm. When Mark went to bed at 9:00 I was only able to see him for about an hour after my long commute home. After the new year came I decided to look for a position in ophthalmology again. About two weeks later I was hired! 


I love my new office. I work with a great group of people and am doing what I enjoy again. I am so thankful to have weekends off and that I get off at 5:00 every weekday. It was a change I desperately needed and came just in the nick of time. Mark and I just found out we will definitely be in San Jose for another year, and this position helps me feel established enough to enjoy the next year down here. 


I also love that I get to constantly learn. This past week one of the doctors taught me about eye alignment. I learned about all sorts of problems like esophorias and exotropias, and am now able to test for them with much more confidence than I previously did. (If you know me, you know how giddy I am when I learn something new.)


"So I saw that there is nothing better for a person than to enjoy their work, because that is their lot. For who can bring them to see what will happen after them?" Ecclesiastes 3:22 


What are you thankful for this week? I'd love to hear!

~Hannah


Image 1 here

Sunday, March 4, 2012

Bye-Bye Breaker Panel!

So it's been quite a while since I've posted. I decided to stop my Sunday Supper posts for a variety of reasons. I am currently toying with a few ideas to get me posting regularly again soon. If you want to read an excellent food blog check out my cousin's blog Brady Munch. She is brutally honest and quite funny. The best part is she doesn't just give recipes but explains the techniques and science behind cooking. I highly recommend it!

Any who, I finally completed a fun project this weekend I have been thinking about for months. Mark and I have been in our current apartment for 11 months  now. We love the neighborhood and the design of the apartment. We slowly made it our own in this past year. But there is one eyesore in our home that has been bugging us both since day one: the breaker panel. We have a hideous metal door that we can see from almost everywhere in our house!

In this picture you can see our dining room is adjacent to our den/office.


Our office is pretty cute don't you think?


Oh wait, what's that?!? Yep, a breaker panel in the middle of the wall.


The designers didn't even try to hide the panel in a closet or behind a corner or even match the wall color. I HATE this panel because you see it in the office, you see it when sitting at the dining table, you even see it every time you walk out of the bedroom or bathroom. It's visible from 80% of our tiny home. Now that we have decided to renew our lease, I thought it was time to take care of the problem.

I contemplated painting it at first, but I didn't want to destroy the metal door. Then I remembered this idea from Sarah Richardson a few years ago:


She hung a picture frame on a piano hinge to cover an electrical panel in one of her investment homes. So off to Lowes, and Aaron Brothers, and Target I went. I picked up this piano hinge for $4 at Lowes.


As far as the picture I used, I made a small print of Mark's favorite painting, "Parts Per Trillion" by Ed Ruscha. (The original painting, which costs a cool couple million is slightly our of our art budget ;)


I bought a frame for around $20 at target, and had the mat cut at Aaron Brothers. By the way, I have now had mats cut at both Aaron Brothers and Michaels. I recommend Aaron Brothers much more than Michaels. One big plus: if all you want is a basic white mat they can complete the order same day, or next day at the very worst. Michaels takes a week.

And here is the final product!


The piano hinge lets us access the panel every time I trip a breaker while blow drying my hair or using the vacuum :D


I hope you had a fun weekend where you are.

~Hannah


Image four here
Image six here

Sunday, January 22, 2012

Sunday Supper: Tourtière Du Shack

It has been very rainy and cold here in San Jose the past few days so some good comfort food was definitely in the works for tonight's Sunday Supper. Mark has been taking a ton of accidents because people tend to crash when it's not 75 and sunny, so I wanted to make something he would love.

I made a Tourtière Du Shack (a meat pie) from Epicurious. This is a French Canadian thing and is oh so sinful. I mean, I thirded the recipe and still used nearly 2 sticks of butter!! This is not a weekly or even monthly kind of meal, but it is a perfect treat for a husband who has been working 12 hour shifts then coming home and writing accident reports.

Here is my precious little pie before and after baking:


The meal was of course delicious. It was very pretty in the pan, but kind of fell apart during plating. I braised the shredded pork last night and did the rest today so I wouldn't be confined to the house ALL day. (If you know me, you probably know I need to "get out" every day. I'm a total homebody but need to leave the house or I get bored.)

Like I said, I made about 1/3 of the recipe and the two of us didn't even finish that. It's is a very heavy yummy dinner! (I used a 6" pie pan instead of a 9") This picture shows how it kind of crumbled when I was trying to serve it:


Here's the recipe! (Serves 6 to 8)


Ingredients

Crust:
3 1/3 cups all-purpose flour
2 cups (4 sticks) chilled unsalted butter, cut into 1/2" cubes
1 teaspoon kosher salt

Filling:
1 1/2 cups low-salt chicken broth
1 1/2 medium onions, chopped, divided
4 garlic cloves, chopped, divided
5 whole black peppercorns plus freshly ground black pepper
5 sprigs thyme
2 bay leaves
1 1/2 pounds boneless pork shoulder (Boston butt), cut into 2" pieces
Kosher salt
1 tablespoon unsalted butter
8 medium button mushrooms, stemmed and finely chopped
1/2 cup dry white wine
1 1/4 pounds ground pork
1/8 teaspoon cinnamon
1/8 teaspoon ground cloves
3/4 cup grated, peeled russet potato
All-purpose flour (for surface)
1 large egg yolk, beaten to blend

9”-diameter deep dish glass or ceramic pie


Directions:

For crust:
Pulse flour, butter, and salt in a food processor until pea-size pieces of butter form. Transfer to a medium bowl. Add 1/4 cup ice water and stir just until shaggy clumps form, adding more water by teaspoonfuls if dry. Divide dough in half; flatten each half into a disk. Wrap disks in plastic wrap and chill for at least 2 hours. DO AHEAD: Dough can be made 2 days ahead. Keep chilled.


For filling:
Preheat oven to 325°F. Combine broth, 1/2 chopped onion, 1 chopped garlic clove, whole peppercorns, thyme, and bay leaves in a medium pot. Add pork shoulder; season with salt and pepper. Bring to a simmer over medium heat.
Cover pot. Transfer to oven; braise until pork shoulder is tender and shreds easily, about 2 hours. Remove from oven; let cool.

Transfer pork shoulder to a work surface. Shred meat with your fingers and transfer to a medium bowl. Strain pan juices through a fine-mesh sieve; add 1/2 cup juices to pork; discard solids in strainer.

Melt butter in a large skillet over medium heat. Add remaining 1 chopped onion and 3 chopped garlic cloves; cook, stirring often, until soft, 5-7 minutes. Add mushrooms; cook, stirring often, until almost all liquid is evaporated, 5-7 minutes. Add wine; stir, scraping up browned bits. Bring to a boil; cook, stirring often, until liquid is almost evaporated, about 5 minutes.

Add ground pork, cinnamon, and cloves. Cook, stirring to break up into small pieces, until pork is cooked through, about 5 minutes. Add potato. Cook until potato is soft, about 10 minutes. Remove from heat. Stir in shredded pork with juices. Season to taste with salt and pepper; let cool slightly. Chill until cold, about 1 hour.
DO AHEAD: Can be made 1 day ahead. Cover and keep chilled.

Roll out 1 dough disk on a lightly floured surface into a 12" round. Transfer to pie dish, leaving overhang. Fill with cooled meat mixture. Roll out remaining dough disk into a 10" round. Place dough over meat filling. Fold overhang over top crust and crimp edges. Brush crust with egg yolk. Cut three 2" slits in top crust. Chill for 1 hour.
Preheat oven to 400°F. Bake tourtière for 30 minutes. Reduce heat to 350°F; bake until crust is golden brown and filling is bubbling, 40-50 minutes. Let cool for 20 minutes before serving.


I hope you are staying cozy wherever you are!

~Hannah

Sunday, January 15, 2012

Sunday Supper: Meatballs With Pappardelle

This week I made the most AMAZING meatballs. They are a recipe from Ad Hoc of course. The mixture combines two types of beef, veal, and some pork. The real kicker is they are stuffed with mozzarella! Mmmmmmmm


Luckily I had a nice butcher who was in a good mood at Whole Foods this afternoon. I made 1/3 of this recipe for Mark and myself, so asking for 4 oz. of this and 3 oz. of that, but don't forget the 3 other oz. of something else etc. could get ugly real fast if you have a cranky butcher. ;)

These meatballs are served with a chunky, hearty tomato sauce and pappardelle. I made my pappardelle from scratch but you can always buy it at the store :) If you want to delight yourself with this recipe read through it once before starting it. You have to leave plenty of time. The sauce takes about 3 hours to make. You don't have to babysit it because it cooks in the oven, but you can't start cooking at 5 thinking you'll eat at 6:30!

Here's the YUMMY recipe: ( Serves 4 gluttons or 6 regular people)


Sachet

1 bay leaf
3 thyme sprigs
10 black peppercorns
1 garlic clove, smashed and peeled

Cut a rectangle of cheesecloth. Lay the spices on the cheesecloth and fold over. Tie with kitchen twine.


Oven Roasted Tomato Sauce

2 tbs canola oil
1 cup finely chopped yellow onion
1 cup minced leeks (white and pale green parts only)
1 cup finely chopped fennel
1 tbs plus 1 tsp minced garlic
Kosher salt
2 tbs light brown sugar
2 tbs red wine vinegar
Two 28-32 oz cans San Marzano whole peeled tomatoes
1 Sachet (above)
Freshly ground black pepper


Preheat oven to 350 degrees.

Combine oil, onion, leeks, fennel and garlic in large Dutch oven and sprinkle with salt. Put in oven and cook for 45 minutes to 1 hour, until vegetables are tender and beginning to caramelize.

Stir in the brown sugar and vinegar and return to oven for another 20 minutes, until liquid is absorbed. Remove from oven.

Meanwhile, drain the canned tomatoes and remove the seeds. Coarsely chop half of the tomatoes. Puree the other half.

Add the tomatoes to the vegetables along with the sachet, season with salt and pepper to taste, and return to oven for 1.5 hours, stirring every 30 minutes. The sauce should be thick and have a full, rich flavor.

Discard the sachet and let the sauce cool to room temperature.


Meatballs with Pappardelle

2 tbs canola oil
1 cup chopped onion
2 tsp minced garlic
Kosher salt and freshly ground black pepper
12 oz boneless beef sirloin
12 oz boneless beef chuck
8 oz pork butt
8 oz boneless veal shoulder or top round
1/4 cup bread crumbs
3 tbs chopped flat leaf parsley, divided
1 large egg
4 oz fresh mozzarella
1 pound pappardelle (store bought, or fresh. See my pasta recipe here)
4 tbs unsalted butter, melted
Juice of 1/2 lemon
Oven-Roasted Tomato Sauce (above)


Heat the canola oil in a large sauté pan over medium heat. Add the onion and garlic, season with salt and pepper, and reduce heat. Cook gently for about 20 minutes, to soften the vegetables without browning them. Remove from heat and set aside.

Meanwhile, trim any sinew from the meat. Cut all of the meat into 1 inch pieces and place in a bowl. Toss with 1 tbs of salt.

Set up a meat grinder with a 3/8 inch die. Fill a large bowl with ice water and nestle a smaller bowl into it to catch the ground meat. Grind the meat, alternating the types of meat. Change the die to 3/16 inch and run the meat through again.

Add the onion and garlic, bread crumbs, 2 tbs of the parsley, and the egg to the meat and mix gently to incorporate evenly (do not overwork).

Divide mixture into 12 equal balls, using a scant 1/2 cup for each.

Cut the cheese into 12 cubes, about 3/4 inch. Shape the meatballs, stuffing a cube of cheese into the center of each one.

Preheat the oven to 425 degrees. Set a cooling rack over a baking sheet.

Bring a large pot of salted water to boil for the pasta.

Put the meatballs on the cooling rack and bake for 15 to 18 minutes, until cooked through but still juicy. Remove from the oven and let rest on the rack for a few minutes before serving.

Meanwhile, cook the pappardelle. Drain and put in a large bowl. Toss with the melted butter, the remaining 1 tbs of parsley, and the lemon juice.

Spoon the tomato sauce into a gratin dish or shallow serving dish. Top with the meatballs. Serve the pappardelle on the side.


I hope you have a beautiful week. I know mine is full of exciting things!

~Hannah

Tuesday, January 3, 2012

Sunday Supper: Fresh Pasta Primavera

This post is a few days late because it is a long one! This week's supper started a few months back when I made raviolis and asked my family for a pasta attachment I could use with my mixer. They ended up getting me 3 attachments for Christmas! One that rolls out the dough. One that cuts it into fettuccine and the third into spaghetti.

I decided to make my own pasta primavera. I couldn't find a recipe I liked so I mixed a few ones to create my own. It turned out very yummy! I mean how can you beat pasta and cream?! The only down side was the pasta turned out a little soft. Im not used to cooking fresh pasta and I think I let it go a minute or two longer than I should have. If you don't want to make your own pasta, or don't have time, the primavera recipe is super quick and easy to use with store bought pasta.


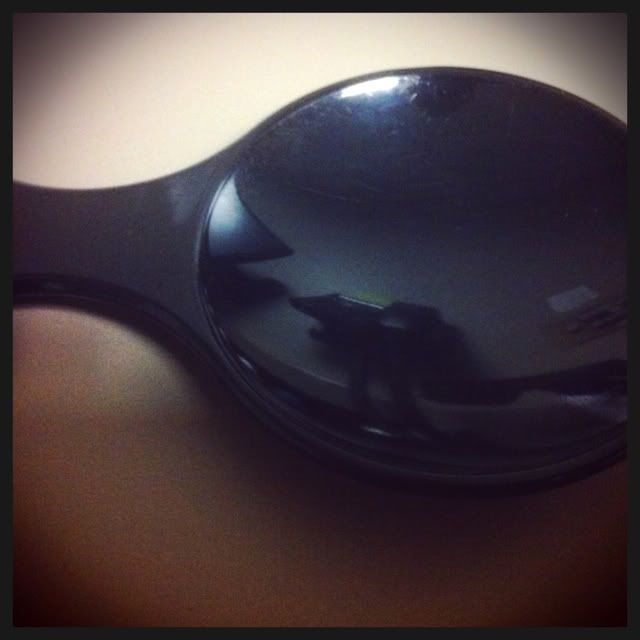
Let me say these pasta attachments are AMAZING. Pasta dough is so tough to roll out by hand, and very hard to get it thin enough. The roller attachment does ALL the work for you! I would have taken pictures of me using it, but I would have needed a third arm. Here is a picture of my Fettuccine strands waiting to be cooked:


I was worried because some of the strands weren't completely cut, but as soon as I put them in the water to cook, a pasta fork made them separate perfectly. So here is my pasta dough recipe, followed by the primavera recipe:


Fresh Pasta (makes .75 lb)

Ingredients:
1 cup semolina flour
1 cup all-purpose flour (I prefer bread flour for higher gluten)
1 large eggs , well beaten
1/2 tablespoon extra virgin olive oil
1/4 teaspoon salt
1/2 cup cold water


Directions:
Combine the semolina flour, all purpose flour, and salt in a large bowl. Using a fork, mix these ingredients together, then using a sifter, sift into another bowl. Set aside.

In a separate bowl, combine the eggs & beat well with a fork. Add extra-virgin olive oil to the eggs and mix with a fork. Add the cold water to the egg & olive oil mixture, and mix with a fork.

Pour the liquid ingredients into your mixer bowl and attach the flat beater. Add half of the sifted flour mixture, turn to speed 2 and mix 20 seconds. Add the rest of the sifted flour mixture and mix an additional 20 seconds.

Exchange flat beater for the dough hook. Turn to speed 2 and knead for 2 to 3 minutes, until a dough ball is formed.

Remove dough from bowl and hand-knead for 2 to 3 minutes. NOTE: Good pasta dough should be elastic and pliable, but FIRM (not soft like bread dough). It should not stick to your fingers or fall apart. To test for the correct consistency, pinch a small amount of dough together after kneading for 2 to 3 minutes -- if the dough stays together without sticking to your fingers or falling apart, it should work well. If too soft, add more flour by dusting the top of the dough and knead some more, continuing to dust the dough with flour until achieving the right consistency. If too dry, wet your hands and knead some more, continuing to wet your hands a little at a time & knead until the right consistency.

Wrap dough in plastic wrap and put in the refrigerator for a minimum of 1 hour (this step is important).

Remove dough from refrigerator and let it rest for 15 minutes. Using your hands, roll dough into a log, about 6 inches long. Cut log into 4 slices, then flatten each piece slightly. Spread slices out so they aren't touching and cover with plastic wrap.

Using the widest setting (1 on the Kitchenaid), turn mixer to speed 2 and taking one piece of the flattened dough, feed through rollers. Fold dough in half & roll again. Repeat 3 more times, lightly dusting the sheet of pasta in between each rolling if it feels the slightest bit sticky.

Move adjustment knob to setting 2 and feed the dough sheet through the rollers once.

Move adjustment knob to setting 3 and feed the dough sheet through the rollers once.

Continue to increase roller setting until desired dough thickness is reached: 3 for Thick "kluski" type egg noodles; 4 for standard egg noodles; 4 or 5 for lasagna noodles, fettuccine, spaghetti, and ravioli; 6 or 7 for tortellini, thin fettuccine, and linguine fini; 7 or 8 for VERY thin "angel-hair" type pasta/capellini or VERY fine linguine.

Separate sheets once desired thickness is achieved with a thin towel or piece of plastic wrap dusted with flour, so the dough doesn't dry out too much.

To cut the noodles, exchange the Pasta Roller Sheet attachment for the cutter attachment of choice, either the fettucine cutter for wider noodles or the spaghetti cutter for spaghetti or linguine. Run each sheet through the cutter. NOTE: Each sheet can be cut in half or thirds before putting through the cutter to prevent "too long" of strips. I prefer to use the longer sheets, rather than cutting them in half or thirds, as this reduces the time it takes to cut each sheet & hang to dry.

After cutting each sheet, hang to dry on a pasta rack. Dry for a minimum of 10 minutes. If you don't have a pasta rack, plastic hangers work great! IMPORTANT: Flour the pasta rack or the plastic hangers before placing pasta on them. ALSO, separate the strips of pasta as best you can, so they aren't touching. This way they won't dry sticking together. If you want to dry the pasta for later use, dry for several hours and then store in airtight plastic bags (i.e. Ziploc Freezer or Storage Bags).

When ready to cook, boil your water and add salt. For the 1.5 pounds of pasta, I use 2 teaspoons of salt. Oil in the water is not necessary.

Fresh pasta will cook faster than commercially bought pasta -- about 4 to 5 minutes in vigorously boiling water for el dente.


Pasta Primavera (serves 2-3)

Ingredients:
.75 lb. pasta (fettuccine or gemelli)
2 carrots, chopped
1 zucchini, chopped
1/2 red bell pepper, chopped
1 cup cherry tomatoes, halved
1 garlic clove, minced
1/2 cup heavy cream
1/2 cup grated Parmesan cheese
Pepper

Directions:
Cook pasta according to directions.

Warm some olive oil in a large skillet. Sauté carrots, zucchini, and bell pepper until almost tender. (you still want them to have some tooth) Add tomatoes and garlic, cook for 1 minute. Stir in cream, cheese, and pepper to taste. Toss warm pasta in skillet to finish, serve immediately.


Thanks again Mom & Dad. I loved my gift! I'll have to make you pasta next time you visit :)


~Hannah

Sunday, December 25, 2011

Sunday Supper: Ad Hoc Crab Cakes & A Christmas For Two

Christmas was very untraditional this year. Not surprisingly, Mark had to work. I know we signed up for this in the early years of his career but that didn't make it any easier. Last week, we celebrated early Christmas with our families in Sacramento, so today was Christmas for two.

Our day started with Mark getting up at 4:30 to go to work while I rolled over and kept sleeping. :) We were happy to find out that it is so slow on Christmas (and CHP doesn't usually write tickets) that Mark was allowed to come home for a few hours. So around 8:00 he came home. I made a yummy savory bread pudding for breakfast and we opened our gifts. Mark went back to work then around noon I went up to his office and did a ride along for the last 5 hours of his shift. I was thankful to be able to do this so I could spend the day with him. It was exciting because we went to a hit and run where they ended up catching the suspect! I wish I could've taken pictures but I signed a paper saying I wouldn't :(

After we came home I made crab cakes for dinner. The recipe is from our favorite restaurant Ad Hoc. The recipe turned out great. I did substitute a few things so I didn't have to buy so much at the grocery store: for the Piment dEspelette Aioli I just mixed mayo with cayenne pepper. I didn't have old Bay Seasoning so I used Chinese All Spice. I also didn't make the vinaigrette but used extra mayo/cayenne for a dipping sauce. The cakes turned out absolutely delicious. The directions were spot on. The outside was crispy and the inside was creamy. Here is the recipe:


Ad Hoc Crab Cakes (Serves 6)


Ingredients:
1-1/2 teaspoons (1/4 oz.) unsalted butter
2 tablespoons finely diced onion
2 tablespoons finely diced red bell pepper
1 garlic clove
1-1/4 lb. lump and/or jumbo crabmeat
¼ cup Piment d’Espelette Aioli
1 teaspoon Worcestershire sauce
1 teaspoon Dijon mustard
1 teaspoon finely chopped flat-leaf parsley
1 teaspoon Old Bay season, or to taste
1 teaspoon kosher salt
1 tablespoon fresh lemon juice
2-1/2 cups panko crumbs
1 large egg
Canola oil
Piquillo Pepper Vinaigrette


Directions:
Position two oven racks in the lower and upper thirds of the oven and preheat the oven to 350-degrees.

Melt the butter in a small saucepan over medium heat.  Reduce the heat to medium-low and add the onion and pepper.  Grate the garlic with a Microplane grater directly into the pan (or mince it and add it).  Cook, stirring often, until the onion and pepper are tender, about 5 minutes.  Remove from the heat and let cool completely.

Place the cleaned crabmeat in a fine mesh basket strainer and drain well.

In a large bowl, whisk the aioli with the Worcestershire, mustard, parsley, Old Bay, and lemon juice to combine well.  Stir in ½ cup of the panko crumbs and the onion mixture.  Gently fold in the crab.  Lightly whisk the egg in a small bowl, and gently fold it into the mixture.

Put the remaining 2 cups panko crumbs in a shallow bowl.  Divide the crab mixture into 12 equal portions.  One portion at a time, gently shape the mixture into a ball (the mixture is very delicate because there is only a small amount of panko in it), roll gently in the panko to coat, and shape into a slightly flattened ball about 2” in diameter and 1” thick.  Add a bit more panko as needed to coat, and set on a plate.

Heat some canola oil in each of two large ovenproof frying pans over medium heat until it shimmers.  If you don’t have two pans, cook the cakes in batches and transfer to a rack set over a baking sheet, then finish in the oven).  Add the cakes, pat down gently, still maintaining the rounded shape, and cook until golden brown on the first side, about 5 minutes.  With a spatula, gently turn each crab cake over and cook on the second side for another 5 minutes, or until golden brown.  Transfer the pans to the oven and cook for 2-3 minutes, to ensure that the crab cakes are hot throughout.

Line a small baking sheet with paper towels.  Transfer the crab cakes to the towels to briefly drain.  Arrange the crab cakes on a serving plate and serve the vinaigrette on the side.


I hope you had a Merry Christmas!


"For to us a child is born, to us a son is given, and the government will be on his shoulders. And he will be called Wonderful Counselor, Mighty God, Everlasting Father, Prince of Peace." Isaiah 9:6


~Hannah

Saturday, December 17, 2011

Sunday Supper: Chicken Bouillabaisse Soup

Ok, this isn't exactly a Sunday Supper, more like a Friday supper but I had to share!


Yesterday I felt just terrible at work. I had the chills, my ears hurt like they had an infection and I had a very sore throat. On my lunch I found out I was running a fever! 101 degrees! I didn't feel right going home because I had been out sick a day last week plus a coworker ended up leaving yesterday. So I tried to stick it out but was just miserable by the time work was done. So I came home, took a very warm bath and promptly fell asleep on the couch.


Mark woke me up a few hours later with this yummy soup he made for me. This is Williams-Sonoma's Chicken Bouillabaisse soup. It is delicious! I know it was labor intensive, I mean he bought a whole chicken and made the stock from scratch. Luckily he made a full batch so I am having another bowl of the soup as I type this right now :)


So if you have ample time to make dinner or want to make the best chicken soup for a sick loved one try this recipe:


Ingredients:

1 chicken, 4 to 5 lb., cut into serving pieces, including backbone
Salt and freshly ground pepper, to taste
3 Tbs. canola oil
2 yellow onions, 1 quartered, 1 diced
2 garlic cloves, smashed
3 fennel bulbs, thinly sliced, stems and fronds reserved
4 cups water
6 cups chicken stock
2 bay leaves
2 Tbs. chicken demi-glace
1 1⁄4 lb. Yukon Gold potatoes, cut 1⁄2 inch thick
Pinch of saffron threads
2 tsp. Pernod (optional)
1 Tbs. minced fresh chervil
1 Tbs. minced fresh tarragon
1 Tbs. fresh lemon juice


Directions:

Season the chicken with salt and pepper. In a large pot over medium-high heat, warm 2 Tbs. of the oil. Working in batches, brown the chicken on all sides, 4 to 5 minutes per side. Add the quartered onion, garlic, fennel stems, water, stock and bay leaves. Bring to a boil, then reduce the heat to medium-low and simmer until the meat nearly falls off the bones, about 1 1¿2 hours. Discard the onion, garlic, fennel stems, bay leaves and backbone.

Transfer the chicken to a colander and let cool. Cut the meat into 1¿2-inch pieces; discard the skin and bones. Skim the fat off the stock and whisk in the demi-glace.

In a fry pan over medium heat, warm the remaining 1 Tbs. oil. Add the diced onion and sliced fennel and cook, stirring occasionally, about 5 minutes. Add the onion mixture to the stock along with the potatoes, saffron and Pernod. Set the pot over medium heat and simmer until the potatoes are cooked through, about 10 minutes. Add the chicken, chervil, tarragon and lemon juice, and season with salt and pepper.


~Hannah

Image from here