Christmas was very untraditional this year. Not surprisingly, Mark had to work. I know we signed up for this in the early years of his career but that didn't make it any easier. Last week, we celebrated early Christmas with our families in Sacramento, so today was Christmas for two.
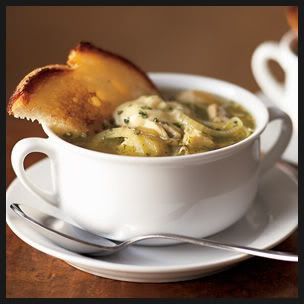
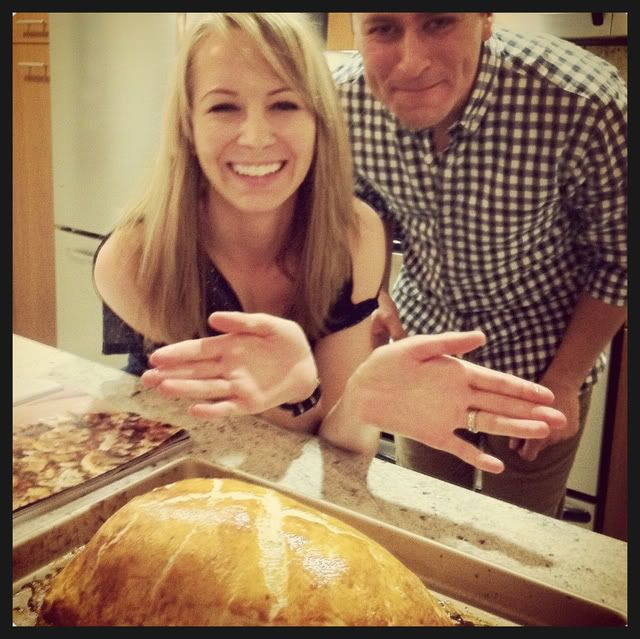
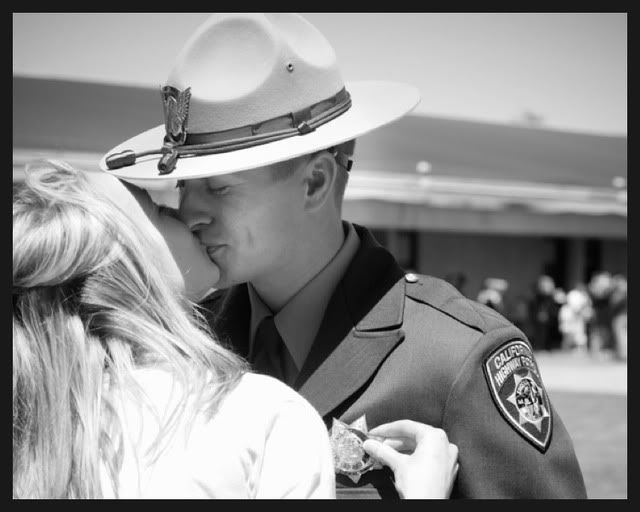
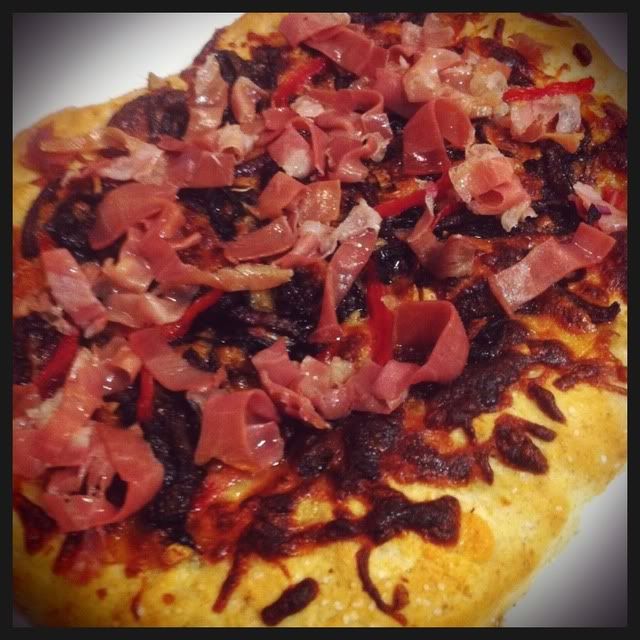
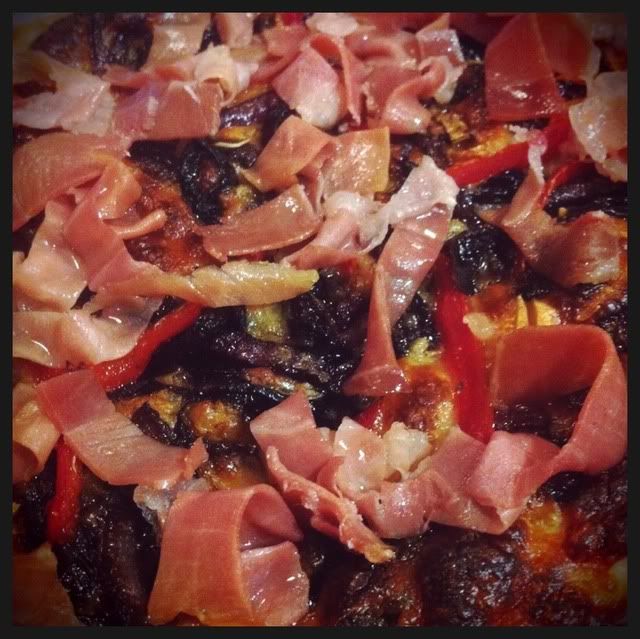
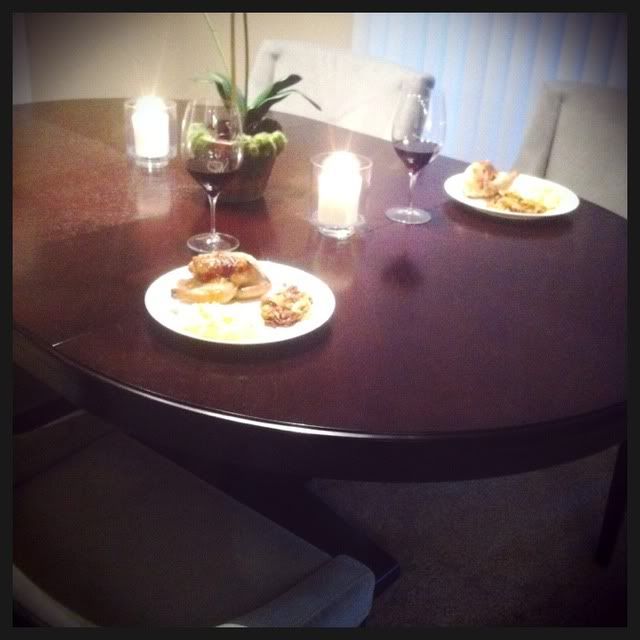
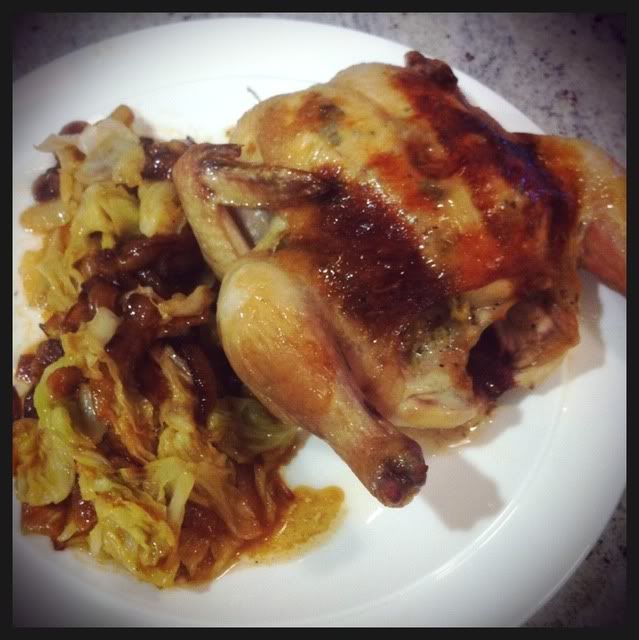
Our day started with Mark getting up at 4:30 to go to work while I rolled over and kept sleeping. :) We were happy to find out that it is so slow on Christmas (and CHP doesn't usually write tickets) that Mark was allowed to come home for a few hours. So around 8:00 he came home. I made a yummy savory bread pudding for breakfast and we opened our gifts. Mark went back to work then around noon I went up to his office and did a ride along for the last 5 hours of his shift. I was thankful to be able to do this so I could spend the day with him. It was exciting because we went to a hit and run where they ended up catching the suspect! I wish I could've taken pictures but I signed a paper saying I wouldn't :(
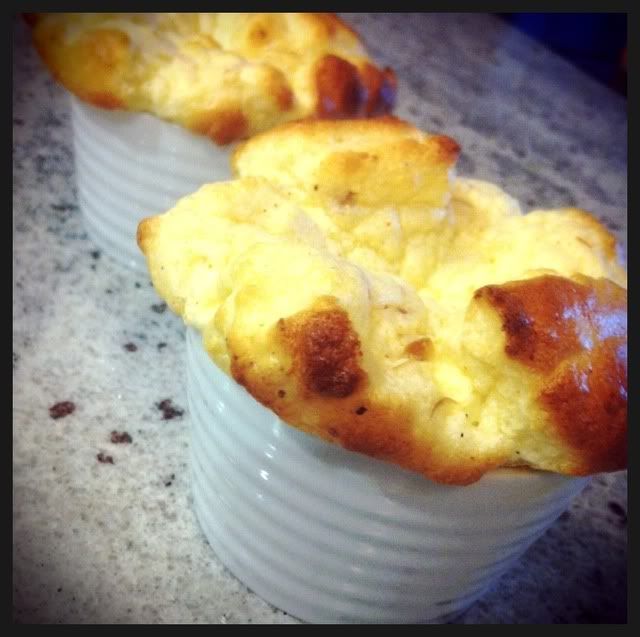
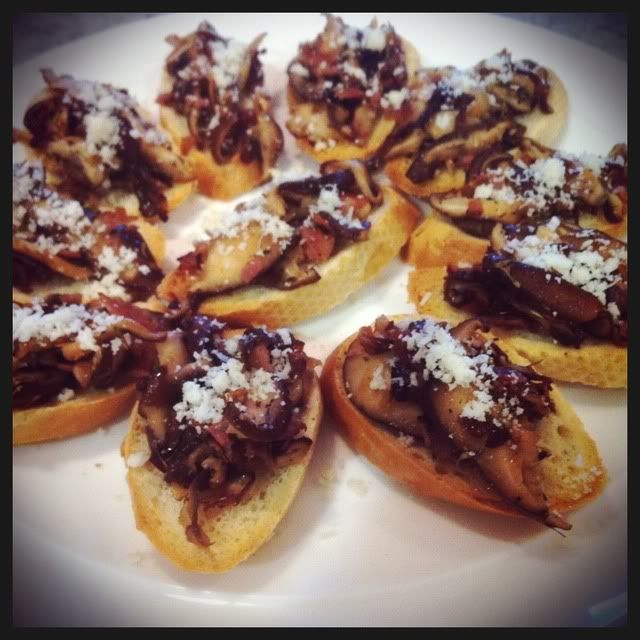
After we came home I made crab cakes for dinner. The recipe is from our favorite restaurant Ad Hoc. The recipe turned out great. I did substitute a few things so I didn't have to buy so much at the grocery store: for the Piment dEspelette Aioli I just mixed mayo with cayenne pepper. I didn't have old Bay Seasoning so I used Chinese All Spice. I also didn't make the vinaigrette but used extra mayo/cayenne for a dipping sauce. The cakes turned out absolutely delicious. The directions were spot on. The outside was crispy and the inside was creamy. Here is the recipe:
Ad Hoc Crab Cakes (Serves 6)
Ingredients:
1-1/2 teaspoons (1/4 oz.) unsalted butter
2 tablespoons finely diced onion
2 tablespoons finely diced red bell pepper
1 garlic clove
1-1/4 lb. lump and/or jumbo crabmeat
¼ cup Piment d’Espelette Aioli
1 teaspoon Worcestershire sauce
1 teaspoon Dijon mustard
1 teaspoon finely chopped flat-leaf parsley
1 teaspoon Old Bay season, or to taste
1 teaspoon kosher salt
1 tablespoon fresh lemon juice
2-1/2 cups panko crumbs
1 large egg
Canola oil
Piquillo Pepper Vinaigrette
Directions:
Position two oven racks in the lower and upper thirds of the oven and preheat the oven to 350-degrees.
Melt the butter in a small saucepan over medium heat. Reduce the heat to medium-low and add the onion and pepper. Grate the garlic with a Microplane grater directly into the pan (or mince it and add it). Cook, stirring often, until the onion and pepper are tender, about 5 minutes. Remove from the heat and let cool completely.
Place the cleaned crabmeat in a fine mesh basket strainer and drain well.
In a large bowl, whisk the aioli with the Worcestershire, mustard, parsley, Old Bay, and lemon juice to combine well. Stir in ½ cup of the panko crumbs and the onion mixture. Gently fold in the crab. Lightly whisk the egg in a small bowl, and gently fold it into the mixture.
Put the remaining 2 cups panko crumbs in a shallow bowl. Divide the crab mixture into 12 equal portions. One portion at a time, gently shape the mixture into a ball (the mixture is very delicate because there is only a small amount of panko in it), roll gently in the panko to coat, and shape into a slightly flattened ball about 2” in diameter and 1” thick. Add a bit more panko as needed to coat, and set on a plate.
Heat some canola oil in each of two large ovenproof frying pans over medium heat until it shimmers. If you don’t have two pans, cook the cakes in batches and transfer to a rack set over a baking sheet, then finish in the oven). Add the cakes, pat down gently, still maintaining the rounded shape, and cook until golden brown on the first side, about 5 minutes. With a spatula, gently turn each crab cake over and cook on the second side for another 5 minutes, or until golden brown. Transfer the pans to the oven and cook for 2-3 minutes, to ensure that the crab cakes are hot throughout.
Line a small baking sheet with paper towels. Transfer the crab cakes to the towels to briefly drain. Arrange the crab cakes on a serving plate and serve the vinaigrette on the side.
I hope you had a Merry Christmas!
"For to us a child is born, to us a son is given, and the government will be on his shoulders. And he will be called Wonderful Counselor, Mighty God, Everlasting Father, Prince of Peace." Isaiah 9:6
~Hannah
Sunday, December 25, 2011
Saturday, December 17, 2011
Sunday Supper: Chicken Bouillabaisse Soup
Ok, this isn't exactly a Sunday Supper, more like a Friday supper but I had to share!
Yesterday I felt just terrible at work. I had the chills, my ears hurt like they had an infection and I had a very sore throat. On my lunch I found out I was running a fever! 101 degrees! I didn't feel right going home because I had been out sick a day last week plus a coworker ended up leaving yesterday. So I tried to stick it out but was just miserable by the time work was done. So I came home, took a very warm bath and promptly fell asleep on the couch.
Mark woke me up a few hours later with this yummy soup he made for me. This is Williams-Sonoma's Chicken Bouillabaisse soup. It is delicious! I know it was labor intensive, I mean he bought a whole chicken and made the stock from scratch. Luckily he made a full batch so I am having another bowl of the soup as I type this right now :)
So if you have ample time to make dinner or want to make the best chicken soup for a sick loved one try this recipe:
Ingredients:
1 chicken, 4 to 5 lb., cut into serving pieces, including backbone
Salt and freshly ground pepper, to taste
3 Tbs. canola oil
2 yellow onions, 1 quartered, 1 diced
2 garlic cloves, smashed
3 fennel bulbs, thinly sliced, stems and fronds reserved
4 cups water
6 cups chicken stock
2 bay leaves
2 Tbs. chicken demi-glace
1 1⁄4 lb. Yukon Gold potatoes, cut 1⁄2 inch thick
Pinch of saffron threads
2 tsp. Pernod (optional)
1 Tbs. minced fresh chervil
1 Tbs. minced fresh tarragon
1 Tbs. fresh lemon juice
Directions:
Season the chicken with salt and pepper. In a large pot over medium-high heat, warm 2 Tbs. of the oil. Working in batches, brown the chicken on all sides, 4 to 5 minutes per side. Add the quartered onion, garlic, fennel stems, water, stock and bay leaves. Bring to a boil, then reduce the heat to medium-low and simmer until the meat nearly falls off the bones, about 1 1¿2 hours. Discard the onion, garlic, fennel stems, bay leaves and backbone.
Transfer the chicken to a colander and let cool. Cut the meat into 1¿2-inch pieces; discard the skin and bones. Skim the fat off the stock and whisk in the demi-glace.
In a fry pan over medium heat, warm the remaining 1 Tbs. oil. Add the diced onion and sliced fennel and cook, stirring occasionally, about 5 minutes. Add the onion mixture to the stock along with the potatoes, saffron and Pernod. Set the pot over medium heat and simmer until the potatoes are cooked through, about 10 minutes. Add the chicken, chervil, tarragon and lemon juice, and season with salt and pepper.
~Hannah
Image from here
Sunday, December 4, 2011
Sunday Supper: Thai Beef Salad
This Sunday I wanted to go much lighter. The holidays have been filled with heavy meals and I want a break! I made Williams-Sonoma's Thai Beef Salad. The flank steak turned out very yummy and tender and the crisp vegetables were perfect. I didn't care for the vinaigrette however.i cook with fish sauce quite often but didn't like it on this salad. Even with the lime juice it wasn't acidic enough. I would make this again but maybe with a simple balsamic vinaigrette? Anyways, here's the recipe:
Thai Beef Salad (serves 4)
Ingredients:
For the Thai vinaigrette:
3 Tbs. Thai fish sauce
3 Tbs. fresh lime juice
2 tsp. sugar
1 to 2 tsp. minced fresh hot chilies with seeds
1 flank steak, 3/4 to 1 lb.
Kosher salt and freshly ground pepper, to taste
2 tsp. canola oil
1 large head butter or other soft-textured leaf lettuce, torn into bite-size pieces (about 8 cups loosely packed)
1 cup thinly sliced English cucumber
1/2 cup thinly sliced sweet onion (such as Maui, Vidalia or Walla Walla) or red onion
1/2 cup red bell pepper strips, 2 inches long by 1/4 inch wide
1/2 cup lightly packed torn fresh mint leaves
1/2 cup lightly packed torn fresh cilantro leaves
1/4 cup lightly packed torn fresh Thai basil leaves (optional)
Directions:
To make the Thai vinaigrette, in a large bowl, stir together the fish sauce, lime juice, sugar and chilies until blended. Set aside.
Preheat a broiler, or prepare a hot fire in a grill and oil the grill rack. Sprinkle the flank steak evenly with salt and pepper; rub the seasonings into the meat. Brush lightly on both sides with the canola oil.
By broiler: Place the flank steak on a broiler pan and slip it under the broiler about 2 inches from the heat source. Broil, turning once, until the meat is seared on the outside and cooked rare to medium-rare in the center, about 4 minutes per side.
By grill: Using tongs, place the flank steak over the hottest part of the fire or directly over the heat elements and grill, turning once, until seared on the outside and cooked rare to medium-rare in the center, about 4 minutes per side.
Transfer the steak to a cutting board and let rest for 20 minutes. Cut across the grain and on the diagonal into very thin slices.
Add the slices of meat to the dressing and toss to coat. Add the lettuce, cucumber, onion, bell pepper, mint, cilantro and Thai basil and toss to coat. Serve immediately.
~Hannah
Sunday, November 20, 2011
Sunday Supper: Savory Barley Soup with Wild Mushrooms and Thyme
This is a quick post because I am quite tired tonight! My sister came to visit me today. We had so much fun doing everything from running errands to having lunch in Los Gatos to picking out fabric for a project at Joann's. I am so thankful she took the time to drive to SJ and spend the day with me! I love you sissy!
When we finally made it home I whipped up a new soup recipe from Williams Sonoma. This could easily be made extra hearty with the addition of beef, or turned vegan by using vegetable stock instead of chicken. Here it is:
Savory Barley Soup with Wild Mushrooms and Thyme
(Serves 4)
Ingredients:
1/2 oz. dried porcini mushrooms
1/2 cup dry white wine
1 Tbs. olive oil
1/2 cup chopped shallots
2 garlic cloves, minced
8 oz. cremini mushrooms, chopped
1 tsp. minced fresh thyme or 1/2 tsp. dried
1/4 tsp. salt, plus more, to taste
1/4 tsp. freshly ground pepper, plus more, to taste
3 cups chicken broth
3/4 cup pearl barley
1 Tbs. tomato paste
3 cups water
2 tsp. fresh lemon juice
Directions:
Rinse the porcini well to remove any dirt or grit. In a small saucepan over medium-high heat, bring the wine to a simmer. Remove from the heat and add the porcini. Let stand for 15 minutes, then drain the porcini over a bowl, reserving the liquid, and finely chop.
In a large, heavy pot over medium-high heat, warm the olive oil. Add the shallots and garlic and sauté until the shallots are wilted, 3 to 5 minutes. Add the cremini, thyme, the 1/4 tsp. salt and the 1/4 tsp. pepper. Cook until the cremini release their liquid and begin to brown, 4 to 5 minutes. Add the reserved mushroom soaking liquid and bring to a boil, stirring to scrape up the browned bits from the pan bottom.
Add the broth, barley, tomato paste, water and the chopped porcini to the pot. Cover and simmer until the barley is tender to the bite, 45 to 50 minutes. Remove from the heat and let cool slightly.
Puree about 1 cup of the soup in a blender. Return the soup to the pot, heat until just hot and stir in the lemon juice. Season with salt and pepper. Ladle the soup into warmed bowls and serve immediately.
~Hannah
Image from here
Sunday, November 13, 2011
Sunday Supper: Beef Wellington
This week's Sunday Supper is actually a post about our dinner last Thursday. Mark's family came to San Jose to visit so we made a big meal for all of us. Mark's step dad has English roots, so we decided to make traditional English food for him. The main course was a Beef Wellington. We have wanted to attempt this for quite some time now. After all, we are big fans of the show Hell's Kitchen and the welly is a staple in that show. Now a 3 pound fillet of beef is not the kindest on the pocketbook so we were waiting for a special occasion to prepare this meal.
The recipe, naturally, is by Gordon Ramsay. How could we use anyone else's?! It was of course delicious. The main problem we ran into was the beef turned out VERY rare. This may be because the recipe called for a 2 pound fillet and we used a 3 pound because of the number of people we were feeding. We did add cooking time but were afraid of overlooking the meat and as a result we had to pan cook the girls' slices to make it more well done. I would definitely repeat this recipe again though. The tips at the end about the puff pastry were helpful and we we didn't have any problems with it bubbling or separating from the meat. Here is the recipe:
Ingredients
2 pound beef fillet
3 tbsp olive oil
8 oz chestnut mushrooms , include some wild ones if you like
2 Tbs. butter
1 large sprig fresh thyme
1/2 cup dry white wine
12 slices prosciutto
1lb 2oz pack puff pastry , thawed if frozen
a little flour , for dusting
2 egg yolks beaten with 1 tsp water
Directions
Heat oven to 450 degrees. Sit the beef on a roasting tray, brush with 1 tbsp olive oil and season with pepper, then roast for 15 mins for medium-rare or 20 mins for medium. When the beef is cooked to your liking, remove from the oven to cool, then chill in the fridge for about 20 mins.
While the beef is cooling, chop the mushrooms as finely as possible so they have the texture of coarse breadcrumbs. You can use a food processor to do this, but make sure you pulse-chop the mushrooms so they don't become a slurry.
Heat 2 tbsp of the oil and all the butter in a large pan and fry the mushrooms on a medium heat, with the thyme sprig, for about 10 mins stirring often, until you have a softened mixture. Season the mushroom mixture, pour over the wine and cook for about 10 mins until all the wine has been absorbed. The mixture should hold its shape when stirred. Remove the mushroom duxelle from the pan to cool and discard the thyme.
Overlap two pieces of cling film over a large chopping board. Lay the prosciutto on the cling film, slightly overlapping, in a double row. Spread half the duxelles over the prosciutto, then sit the fillet on it and spread the remaining duxelles over. Use the cling film's edges to draw the prosciutto around the fillet, then roll it into a sausage shape, twisting the ends of cling film to tighten it as you go. Chill the fillet while you roll out the pastry.
Roll out a third of the pastry to a 18 x 30cm strip and place on a non-stick baking sheet. Roll out the remaining pastry to about 28 x 36cm. Unravel the fillet from the cling film and sit it in the centre of the smaller strip of pastry and brush the pastry's edges, and the top and sides of the wrapped fillet, with beaten egg yolk. Using a rolling pin, carefully lift and drape the larger piece of pastry over the fillet, pressing well into the sides. Trim the joins to about a 4cm rim. Seal the rim with the edge of a fork or spoon handle. Glaze all over with more egg yolk and, using the back of a knife, mark the beef Wellington with long diagonal lines taking care not to cut into the pastry. Chill for at least 30 mins and up to 24 hrs.
Heat oven to 390 degrees. Brush the Wellington with a little more egg yolk and cook until golden and crisp - 20-25 mins for medium-rare beef, 30 mins for medium. Allow to stand for 10 mins before serving in thick slices.
Tips
Sealing the pastry: Use the rounded end of a fork or spoon handle to seal the edges rather than the prongs of a fork - using the prongs will only pierce the pastry rather than joining it.
Trim carefully: Lower the chances of the edges separating by giving yourself lots of room - and don't trim the pastry too close to the meat.
Keep it air-free: Drape over the top layer of pastry very carefully, smoothing it down with your hands as you go. You don't want any air trapped between the pastry and the meat.
Gordon's tips: Brush the meat as well as the pastry with egg wash. This will make the top layer of pastry stick to the meat and stop it from rising and leaving a gap.
Sunday, October 30, 2011
Sunday Supper: Honey-Glazed Pork with Wilted Greens
This week I was looking to make something a little lighter. Also, I was in Sacramento last night and this morning visiting family so I did not have time to prepare a labor intensive meal. I decided to make Martha Stewart’s Honey-Glazed Pork with Wilted Greens. This is a great recipe that is quick and would be perfect for a week night dinner. The wilted escarole, spinach and fennel had the perfect amount of sweetness to complement the pork. The only change I made was brining my pork prior to cooking it. Mark and I do not make pork very regularly, but when we do, we ALWAYS brine it to make is more moist. This is a great website that explains how to brine. Here is the recipe:
Honey-Glazed Pork with Wilted Greens (serves 4)
Ingredients
2 teaspoons Dijon mustard
3 1/2 tablespoons red-wine vinegar
4 tablespoons raw honey
1 large garlic clove, finely chopped
1 teaspoon coarsely chopped fresh rosemary
1 tablespoon plus 4 teaspoons olive oil
1 3/4 pounds pork tenderloin (about 2)
3/4 teaspoon coarse salt
Freshly ground pepper
1 large fennel bulb, trimmed and sliced lengthwise into thin strips
1/2 head escarole, cut into 2-inch strips
1/2 pound spinach, washed well
Directions
Preheat oven to 375 degrees. Make glaze: In a small bowl, whisk together 1 teaspoon mustard, 2 tablespoons vinegar, 2 tablespoons honey, garlic, rosemary, and 2 teaspoons oil.
Place pork tenderloins in a shallow baking dish; pour glaze over pork, turning to coat evenly. Sprinkle with 1/2 teaspoon salt; season with pepper.
Roast in oven, spooning glaze over pork occasionally, until thickest part of pork reaches 155 degrees on an instant-read thermometer, 30 to 35 minutes. Remove from oven; let rest until pork reaches 160 degrees, about 10 minutes.
Meanwhile, make vinaigrette: In a small bowl, combine remaining 2 tablespoons honey, 1 1/2 tablespoons vinegar, and 1 teaspoon mustard. Whisk until honey is dissolved. Slowly whisk in 1 tablespoon oil until emulsified. Whisk in any accumulated cooking juices from baking dish, if desired.
Heat remaining 2 teaspoons oil in a 12-inch saute pan over medium-high heat. Add fennel, escarole, spinach, and a splash of water; cook until greens are slightly wilted, about 1 1/2 minutes.
Add vinaigrette and remaining 1/4 teaspoon salt to pan, stirring just to coat greens, about 30 seconds. Remove from heat; divide among four serving plates. Slice pork about 1/2 inch thick; arrange alongside greens. Serve immediately.
Mark and I also sat down tonight and discussed some possible changes that may happen in the next 6-8 months. (NO baby, don’t worry!) There are many logistical hurdles that we need to figure out, and we definitely need God to open some doors for this goal to happen. Please keep us in your prayers over the next half a year and hopefully some great things will be on the horizon!
~Hannah
Sunday, October 16, 2011
Sunday Supper: Saffron Risotto with Butternut Squash
This week I wanted to try making something with saffron. I love the flavor of the spice but have never cooked with it myself. I was happy to see I could buy a (small) bottle of it at Trader Joes for $6!
What I made was a Saffron Risotto with Butternut Squash from Ina Garten. It was absolutely delicious! The recipe could easily be turned vegetarian if you omit the pancetta and use vegetable stock instead of chicken. Here is the recipe:
Saffron Risotto with Butternut Squash (serves 4)
Ingredients
1 butternut squash (2 pounds)
2 tablespoons olive oil
Kosher salt and freshly ground black pepper
6 cups chicken stock, preferably homemade
6 tablespoons (3/4 stick) unsalted butter
2 ounces pancetta, diced
1/2 cup minced shallots (2 large)
1 1/2 cups Arborio rice (10 ounces)
1/2 cup dry white wine
1 teaspoon saffron threads
1 cup freshly grated Parmesan cheese
Directions
Preheat the oven to 400 degrees.
Peel the butternut squash, remove the seeds, and cut it into 3/4-inch cubes. You should have about 6 cups. Place the squash on a sheet pan and toss it with the olive oil, 1 teaspoon salt, and 1/2 teaspoon pepper. Roast for 25 to 30 minutes, tossing once, until very tender. Set aside.
Meanwhile, heat the chicken stock in a small covered saucepan. Leave it on low heat to simmer.
In a heavy-bottomed pot or Dutch oven, melt the butter and saute the pancetta and shallots on medium-low heat for 10 minutes, until the shallots are translucent but not browned. Add the rice and stir to coat the grains with butter. Add the wine and cook for 2 minutes. Add 2 full ladles of stock to the rice plus the saffron, 1 teaspoon salt, and 1/2 teaspoon pepper. Stir, and simmer until the stock is absorbed, 5 to 10 minutes. Continue to add the stock, 2 ladles at a time, stirring every few minutes. Each time, cook until the mixture seems a little dry, then add more stock. Continue until the rice is cooked through, but still al dente, about 30 minutes total. Off the heat, add the roasted squash cubes and Parmesan cheese. Mix well and serve.
~Hannah
Sunday, October 9, 2011
Happy Anniversary!
Two years ago today I married my best friend. I am so thankful the Lord gave me such a hard working, kind hearted man to be partners with. We have been on a wild ride these two years that has been fast and full of changes, but I wouldn't want to be on this roller coaster with anyone but him. I am a blessed girl. Now off to Monterey & Carmel to celebrate!
Happy Anniversary my love!
XOXO
Sunday, October 2, 2011
Sunday Super: Bratwurst with Apples, Onion, & Sauerkraut
For the start of October, I thought we would celebrate Oktoberfest. Mark and I do seem to have an affinity for German items, so why not?! I found a recipe for Bratwurst with Apples, Onion, & Sauerkraut on Epicurious. It was actually VERY easy to make. You really couldn't mess this one up. It was perfect because I was able to clean the house while it was roasting in the oven :) The mixture of apples, onion, and sauerkraut was delicious, not too sour, not too sweet. Here is the recipe:
And what would an Oktoberfest meal be without authentic Bavarian festival lager?
Bratwurst with Apples, Onion, & Sauerkraut
Ingredients:
- 1 teaspoon caraway seeds
- 1 teaspoon fennel seeds
- 1 tablespoon Wondra flour
- 1/2 teaspoon ground black pepper
- 4 cups sauerkraut (preferably fresh), rinsed, drained, squeezed dry (from one 32-ounce jar)
- 1 large onion (about 1 pound), halved lengthwise, thinly sliced crosswise
- 3 large Golden Delicious apples (about 1 1/2 pounds total), peeled, cored, thinly sliced
- 6 whole smoked bratwurst (about 1 pound), pierced all over with skewer
- 4 bay leaves
- 1 cup beef broth
- 2 tablespoons dry vermouth
- 2 tablespoons ketchup
- 1 1/2 tablespoons butter, melted
- Pumpernickel bread or whole grain
Instructions:
Position rack in center of oven; preheat to 400°F. Place caraway seeds and fennel seeds in small resealable plastic bag. Crush seeds with mallet. Add flour and pepper to bag; shake to blend.
Spread sauerkraut over bottom of 13x9x2-inch glass or ceramic baking dish. Sprinkle 1/3 of flour mixture over. Arrange onion slices over; sprinkle with half of remaining flour mixture, then lightly with salt. Spread half of apple slices over, then sprinkle with remaining flour mixture. Place bratwurst over apples, then arrange remaining apple slices around bratwurst. Tuck in bay leaves.
Mix broth, vermouth, and ketchup in measuring cup. Pour broth mixture evenly over. Cover tightly with foil.
Roast bratwurst 45 minutes. Uncover; brush with melted butter. Roast uncovered until edges of apples and sausages begin to brown, about 25 minutes longer. Serve with bread.
And what would an Oktoberfest meal be without authentic Bavarian festival lager?
Guten Appetit!
~Hannah
Sunday, September 25, 2011
Sunday Supper: Butternut Squash Ravioli with Brown Butter and Pecans
A fall inspired dinner was perfect tonight because we actually had some rain in San Jose! Tonight’s menu was an appetizer of crostini with fig jam, ricotta, and prosciutto followed by a butternut squash ravioli from Williams Sonoma. Now I was nervous because this was my first time making fresh pasta. (Surprising because I am such a pasta head!) It was definitely labor intensive but well worth it. I did buy a ravioli punch today at Sur La Table. This made forming the squares very quick.
I rolled the pasta by hand, but a pasta attachment for my mixer would make this MUCH easier. (hint hint to any family reading this! Christmas is around the corner ;)
The ravioli’s were yummy and very fall-ish. The only change I would make is making the filling a bit sweeter. Maybe adding a little bit of brown sugar? Not quite sure, but definitely a recipe I will repeat. For the crostini, I toasted some baguette slices that were drizzled with olive oil. Then I spread some fig jam on them, put about a teaspoon of ricotta cheese on top, followed by a thin slice of prosciutto. Yum!
Butternut Squash Ravioli with Brown Butter and Pecans
Ingredients: (Serves 6-8)
For the filling:
- 1 butternut squash, 2 to 2 1/2 lb., halved lengthwise and seeds discarded
- 1 tsp. extra-virgin olive oil
- 1 egg, lightly beaten
- 1/2 cup finely shredded Gruyère cheese
- 1 tsp. salt
- 1/2 tsp. ground cinnamon
- 1/2 tsp. ground cloves
- 1/2 tsp. freshly ground pepper
For the pasta dough:
- 3 eggs
- 1/2 tsp. salt
- 2 to 2 1/4 cups all-purpose flour
- 2 tsp. salt
- 8 Tbs. (1 stick) unsalted butter
- 1/4 cup coarsely chopped pecans
- 1 Tbs. fresh lemon juice
- 1 Tbs. fresh sage leaves for garnish
Directions:
Preheat an oven to 375°F.
To make the filling, rub the cut sides of the squash with the olive oil and place, cut side down, on a baking sheet. Bake until tender when pierced with a knife, 1 to 1 1/2 hours. Let cool, then scoop the flesh into a bowl and mash with a fork. Mix in the egg, cheese, salt, cinnamon, cloves and pepper. Set aside. (The filling can be prepared up to 12 hours in advance and refrigerated.)
In the bowl of an electric mixer fitted with the flat beater, whisk together the eggs and salt. With the mixer running on low speed, gradually add 2 cups of the flour, about 1/4 cup at a time, until most has been added and the dough forms a ball on the beater. Pinch the dough; it should feel moist but not sticky and be fairly smooth. If not, beat in more flour as needed. Transfer the dough to a lightly floured surface and knead until firm, smooth and moist but not sticky, about 1 minute. Cover with an inverted bowl and let rest for at least 30 minutes or up to 2 hours.
Divide the dough in half. On a large, floured surface, roll out half the dough into a 16-by-20-inch rectangle about 1/8 inch thick. Using a knife, lightly mark the dough into 1 1/2-inch squares. Place 1 tsp. filling in the center of each square. Roll out the remaining dough into a same-sized rectangle and lay it over the filling. Lightly press down on the mounds of filling, then press around each filling to seal. Using a pastry wheel or knife, cut along the length on both sides and across the top and bottom to make 1 1/2-inch squares. Crimp the edges to seal. (The ravioli can be made up to 2 hours in advance. Place in a single layer on a floured kitchen towel, dust the tops with flour and cover with another towel.)
Bring a large pot of water to a boil over high heat and add the salt. Working in batches, use a slotted spoon to slide the ravioli into the water. Reduce the heat to low and simmer until tender, 3 to 5 minutes. Using the spoon, transfer to a warmed platter.
Meanwhile, in a fry pan over medium-high heat, melt the butter. Add the pecans and cook, stirring, until the butter is golden, 2 to 3 minutes. Cool for about 30 seconds, then stir in the lemon juice and pour the brown butter mixture over the ravioli. Garnish with the sage and serve immediately.
~Hannah
Tuesday, September 20, 2011
Latest Project: Graduation Gallery
I have been meaning to frame some prints from Mark’s graduation since, well, May! I finally got around to it this month. I chose to hang a series of three frames in our bedroom above Mark’s nightstand. It made good use of a wall that was previously blank. I don’t know about you, but I love white frames. They have a totally different effect than black frames do. I have to watch myself though, because I could easily use “feminine” white colors throughout the whole house and make it look like a man never step foot in there. This nook seemed to have an abundance of “masculine” already because of the nightstand, so I went for my favorite white frames. :) Here is the final product:
The photos were all taken by our favorite, Allison Stahl. She was our wedding photographer and we knew we had to hire her for Mark’s graduation. I am glad we did because she captured the day in ways we never could. Here are some close ups of the three pictures I used in this project:
P.S. The Sunday Supper series has been on hold the past two weeks. Two Sundays ago I had a wonderful girls’ day with my mom and sister in the city. This past Sunday Mark and I went on a quick trip to Napa and did not feel like cooking when we got home. But I already have a great recipe (fall inspired) planned for this week so stay tuned!
~Hannah
Sunday, September 4, 2011
Sunday Supper: Beef Medallions with Spring Potatoes
This week I made a yummy steak and mashed potato meal. It was surprisingly easy to make (it took me under 30 min including prep). The simple pan sauce was incredibly yummy. This is great meal to make when you don't have much time, as was the case for me today. The only hiccup I had was by the time I made it to Whole Foods they had sold out of tri-tip so I had to use a other cut of beef that wasn't as thick. This made my "medallions" turn into strips haha. Here is the recipe!
Ingredients:(serves 4)
1 1/2 lb. Yukon Gold potatoes, peeled and cut into 1-inch pieces
1 tsp. coarse kosher salt, plus more, to taste
3 Tbs. olive oil
1/2 head small savoy cabbage, cored and thinly sliced crosswise
Freshly ground pepper, to taste
2 Tbs. unsalted butter
1 1/4 lb. beef tri-tip roast, excess fat trimmed
2 large shallots, halved lengthwise and thinly sliced crosswise
1 Tbs. all-purpose flour
2 cups low-sodium beef broth
2 Tbs. dry vermouth
2 tsp. Dijon mustard
1 1/2 Tbs. minced fresh thyme, plus more for garnish
Directions:
Put the potatoes in a large pot. Add water to cover by 2 inches and then add the 1 tsp. salt. Bring to a boil and cook until the potatoes are tender, about 10 minutes. Meanwhile, in a large nonstick fry pan over medium heat, warm 1 Tbs. of the olive oil. Add the cabbage and season with salt and pepper. Sauté until almost tender, about 8 minutes. Set aside.
Reserve 1 cup potato cooking liquid, then drain the potatoes. Return the potatoes to the pot and mash coarsely with a fork, thinning with the cooking liquid as needed. Mix in 1 Tbs. butter, the cabbage and a generous amount of pepper. Adjust the seasonings if needed. Cover to keep warm.
Cut the beef across the grain into 1/4-inch slices and then cut into 2-inch lengths. In a large fry pan over medium-high heat, warm 1 Tbs. of the olive oil. Working in batches, add the beef in a single layer and cook until just colored, about 30 seconds per side. Transfer to a plate and season with salt and pepper.
Add the remaining 1 Tbs. olive oil to the fry pan. Add the shallots, reduce the heat to medium, and stir until tender and golden brown, about 6 minutes. Add the flour and stir for 20 seconds. Gradually stir in the broth and vermouth. Simmer, stirring frequently, until the sauce thickens slightly, about 6 minutes. Stir in the mustard and the 1 1/2 Tbs. thyme. Remove the pan from the heat and stir in the remaining 1 Tbs. butter until melted. Adjust the seasonings if needed.
Transfer the beef and potatoes to a platter or divide among 4 warmed plates. Drizzle the sauce over the beef, sprinkle with thyme and serve immediately.
Sunday, August 28, 2011
Sunday Supper: Carrot & Jicama Salad
This week I made a carrot and jicama salad with garlic lime shrimp. It was a perfect light meal for a warm summer evening. The recipes were very easy to make. The only thing I was disappointed in was the way my jicama salad wad shredded. The picture from my cookbook had lovely long strands of white and orange. My shreds turned our more the size of shredded mozzarella cheese. It still tasted wonderful though. :) here are the recipes:
Carrot and Jicama Salad with Lime Vinaigrette (Serves 6)
Ingredients:
2 tsp. ground cumin
3 Tbs. fresh lime juice
2 Tbs. canola oil
1 Tbs. minced, seeded jalapeño chili
1 tsp. minced garlic
1/2 tsp. kosher salt
1 large or 2 medium jicamas, about 3/4 lb.
3 carrots, about 10 oz., peeled
1/4 cup finely chopped fresh cilantro
Directions:
In a small, dry fry pan over medium-low heat, warm the cumin just until fragrant, about 20 seconds. Transfer to a small bowl. Add the lime juice, canola oil, jalapeño, garlic and salt and whisk until blended. Set the lime vinaigrette aside.
Using a sharp knife, trim the stem and root ends from the jicama(s), then cut into 4 or 6 manageable wedges. Cut and lift up a small piece of the brown skin near the stem end and pull down to remove. Use a vegetable peeler to remove any tenacious pieces of skin and the tough layer underneath.
Using a food processor fitted with the shredding disk or the largest holes of a box grater-shredder, shred the carrots and jicama wedges. In a large bowl, combine the shredded carrot and jicama with the cilantro. Pour the vinaigrette over the vegetables and toss gently to mix.
Divide the salad evenly among small plates or bowls. Serve immediately.
Grilled Lime Shrimp:
Ingredients:
1/4 teaspoon fresh lime zest
1/8-1/4 teaspoon cumin
1/4 teaspoon dried oregano
1/4-1/2 teaspoon salt
1/4 teaspoon pepper
1 tablespoon olive oil
1 -1 1/2 tablespoon fresh squeezed lime juice
1 1/2 cloves garlic, minced
1/2 lb shelled deveined uncooked shrimp
Directions:
Mix together the first 8 ingredients in a bowl. Add shrimp; toss to coat. Let stand at room temperature for 10 minutes to marinate. Thread shrimp on metal skewers; reserve marinade. Place skewered shrimp on grill over medium heat. Cook 3-7 minutes or until shrimp turn pink, turning once and brushing with marinade occasionally.
Sunday, August 21, 2011
Sunday Supper: Pizza with Prosciutto & Balsamic Onions
This Sunday I made a delicious pizza with prosciutto, balsamic onions, and roasted bell pepper. I combined two recipes: one from Williams Sonoma for the dough, and the other from Bon Appetit via Epicurious.com for the toppings. I really liked that there was no sauce on this pizza. Just a little bit of garlic infused olive oil brushed on the crust before baking. If you wanted to make a vegetarian version, you could switch the prosciutto for sautéed mushrooms. Pizza dough is actually very easy to make. I have read online that the dough is best if made 1-2 days ahead of time and chilled in the refrigerator until ready to use. I made my dough last night and let it sit until today, and the crust was delicious! I am interested in trying this crust using only whole wheat flour, but I’m not sure what this would do to the consistency of the pizza. I’ll try this next time.
Ingredients:
For the pizza dough:
1 cup lukewarm water
1 Tbs. honey
2 tsp. olive oil
1 envelope (2 1/2 tsp.) active dry yeast
1 1/2 cups all-purpose flour, or more as needed
1/2 cup whole-wheat flour
1 tsp. kosher salt
Toppings:
2 tablespoons plus 1/2 cup olive oil
1 12-ounce red onion, thinly sliced
2 tablespoons balsamic vinegar
2 teaspoons Worcestershire sauce
4 large garlic cloves, chopped
1 large red bell pepper
1 cup (packed) coarsely grated whole-milk mozzarella cheese
3 tablespoons coarsely grated Parmesan cheese
4 thin slices prosciutto, sliced crosswise into thin strips
Directions:
Position a rack in the lowest position in an oven and preheat to 450°F. Lightly oil one 14-by-16-inch baking sheet, one 14-inch pizza pan or four 9-inch pizza or tart pans.
To make the dough, in a small bowl, stir together the lukewarm water, the honey and 1 tsp. of the olive oil until blended. Sprinkle the yeast on top and let stand until foamy, about 10 minutes.
In a large bowl, using a wooden spoon, stir together 1 cup of the all-purpose flour, the whole-wheat flour and the salt. Pour in the yeast mixture and stir, adding enough of the remaining 1/2 cup all-purpose flour, or more if needed, to form a soft dough.
Turn the dough out onto a floured work area and knead until the surface of the dough is very smooth, about 5 minutes, adding more all-purpose flour as needed. The dough should be soft but not sticky.
Lightly oil a large bowl with the remaining 1 tsp. olive oil. Form the dough into a ball and place in the bowl. Turn to coat with the oil. Cover the bowl with a clean kitchen towel and let the dough rise in a warm place until doubled in bulk, about 1 hour.
Heat 2 tablespoons oil in heavy medium skillet over medium-high heat. Add onion and sauté until golden, about 12 minutes. Add vinegar and Worcestershire sauce. Reduce heat to medium-low; simmer until liquid cooks away and onion is very tender, about 4 minutes; season onion with salt and pepper.
Heat remaining 1/2 cup oil in heavy small skillet over medium-low heat. Add garlic and sauté just until garlic begins to brown, about 4 minutes. Using slotted spoon, transfer garlic to custard cup. Pour oil into separate small bowl.
Char bell pepper over gas flame or in broiler until blackened on all sides. Enclose in paper bag; let stand 10 minutes. Peel, seed, and slice thinly.
On a lightly floured work surface, gently stretch or roll out the dough to fit the prepared pan(s). Transfer the dough to the pan(s).
Brush 1 tablespoon reserved garlic oil over dough, leaving 1/2-inch plain border. Sprinkle with mozzarella, then reserved garlic and balsamic onion. Top with pepper strips in spoke pattern. Sprinkle with Parmesan.
Bake until the crust is nicely browned, 20 to 25 minutes. Spray the bottom of the oven with water at regular intervals 3 times during the first 5 to 10 minutes of baking. Arrange prosciutto atop pizza. Bake until prosciutto softens, about 30 seconds.
Sunday, August 14, 2011
Sunday Supper: Roast Cornish Game Hen
For this week’s Sunday Supper I made Roasted Cornish Game Hens with Creamy Polenta and Caramelized Savoy Cabbage. I am only posting the game hen recipe for the sake of time, but if you would like either of the other two recipes please let me know. (I’ll be lazy and e-mail you a scanned picture of the recipe!) I was very excited because this was our first meal at our new dining set! We have had the table for over a year, but were borrowing my parent’s chairs while living in Sacramento. When we moved, I chose not to take my parent’s chairs, and I FINALLY had new dining chairs delivered last week! It is so nice not eating on the couch.
All three recipes were from my Ad Hoc cookbook. Now if you have never been to Ad Hoc, you should go. It is Mark and my favorite restaurant we have eaten as thus far. The owner is Thomas Keller who also owns The French Laundry and Bouchon. All three restaurants are in Yountville. The French Laundry is a three Michelin star restaurant, and we have not saved up the funds to dine there yet haha (one day!). Bouchon recently earned its first Michelin star. Mark and I ate there on our honeymoon and it was amazing. Bouchon features classical French food and amazing wines (it IS in Yountville after all!). Now Ad Hoc is also owned by Thomas Keller, so you know the caliber of food prepared is spectacular. Ad Hoc is a fun and casual restaurant featuring traditional, usually American style home cooked meals. But a type of “home cooked” you’ve never experienced before. It is incredibly delicious. The other thing we love about this restaurant is how casual and laid back it is. If you know anything about Mark and me you know we love to relax and be casual, big to do’s are not really our thing. It is perfectly acceptable to wear jeans and a T-shirt in this restaurant. It is also fun because the banquet seating allows you the opportunity to meet the others diners near you. (We have met some interesting people in that place!) Anyways, this whole paragraph is just trying to convince you to visit Ad Hoc if you are ever in Yountville.
The Game Hen recipe was INCREDIBLY easy to make. The meat turned out moist and flavorful and I did not have to baste it once! Also, I didn’t bother trussing the bird because I didn’t have any kitchen twine. This is a great recipe to half or double depending on the number of people you are feeding. My game hen was HUGE (almost 2 lbs.) so I only cooked one hen for Mark and me to share. It was plenty. If you are fortunate enough to find Poussin or super small game hens, do make one per person. The entire recipe took me about 90 minutes to prep and cook, which isn’t terrible. Here is the recipe:
Roast Poussins or Cornish Hens (serves 6)
Ingerdients:
Six 1.25 pound poussins or Cornish game hens
Gremolata Butter:
1 teaspoon black peppercorns
zest of 2 lemons
2 large cloves garlic, grated with Microplane or minced
12 tablespoons unsalted butter, at room temperature
2 tablespoons lemon juice
2 tablespoons parsley, finely chopped
1 teaspoon kosher salt
kosher salt and freshly ground black pepper
canola oil
6 cloves garlic, smashed, skin left on
1 bunch thyme
fleur de sel
Directions:
Remove the poussins or hens from the refrigerator and set aside while you make the butter.
Using the pestle, grind the peppercorns in a mortar (or put them in a heavy-duty plastic bag and crush with a meat pounder or heavy pan). Add the lemon zest and garlic and mix into a paste. Put the butter in a medium bowl and mix in the pepper mixture, followed by the lemon juice, parsley and salt. Mix together until smooth and chill.
Remove the neck and innards if they are still in the cavities of the poussins or game hens, and discard. Rinse the inside of the birds and dry well with paper towels. Season the inside of the birds with salt and pepper. Cut out the wishbones. Leave any fat or skin at the neck attached, and trim any other excess fat.
Starting at the cavity end of each bird, carefully run your fingers between the skin and the flesh of the breasts and then the thighs to loosen the skin. Spread about 1/2 tablespoon of the butter under the skin of each thigh and spread the remaining 1 tablespoon of butter under each side of the breast.
Truss the birds. Let stand at room temperature for 30 minutes, or until they come to room temperature.
Preheat the oven to 450F. Brush the birds with canola oil and season with salt. Place the birds on their backs in a roasting pan that will hold the birds in a single layer. Scatter the garlic and thyme evenly around them.
Transfer to the oven and roast for 25 to 30 minutes; the temperature should register 160F in the meatiest portions of the bird (the thighs and under the breast where the thigh meets the breast), and the juices should run clear. If necessary, baste the birds, return to the oven, and roast; check every 5 minutes.
Set a cooling rack over a baking sheet. Transfer the birds, along with the garlic and thyme to the rack. Baste the birds with the pan juices, and let rest for 15 minutes.
Serve the birds whole, or cut into halves or quarters. Arrange on a serving platter, garnish with the thyme and garlic, and sprinkle with fleur de sel.
Sunday, August 7, 2011
New Series: Sunday Supper
Sunday afternoons are when I do my weekly shopping trip. Mark currently works weekends so I am home alone and have the day to relax and complete any projects I have going. I decided to start making a big Sunday meal each week because I have this free time. Now it may not be BIG (it is just Mark and me eating after all), but I want to use this time to experiment with new recipes and get away from the "standard" dishes we cook during the week.
So here is the start of a weekly series! Sunday Supper. I will post the week's recipe and pictures of the finished product. Hopefully most ventures will be successful but I will share the failures as well!
This week I was inspired when watching a cheese soufflé challenge on an episode of Master Chef. So for our first Sunday Supper I made a Smoked Gruyere Cheese Soufflé and Crostini with Shiitake Mushrooms and Pancetta. Thankfully this was a great success! The soufflé was light and fluffy but still moist. I used a smoked Gruyere to complement the pancetta in the Crostini, but any type of cheese that melts smoothly will work just fine. Here are the recipes:
Cheese Soufflé (Serves 2)
Ingredients
3 tablespoons butter
2 tablespoons grated Parmesan
2 teaspoons flour
1/2 cup milk
1/2 cup grated Gruyere or Cheddar
pinch cayenne pepper
pinch nutmeg
2 egg yolks
2 egg whites
pinch salt
Directions
Heat oven to 375° F. Grease one 16-ounce or two 8-ounce ramekins with 1 tablespoon of butter. Coat with the Parmesan, then tap out the excess. Set aside.
In a small saucepan, over medium heat, melt the remaining butter. Stir in the flour and cook 1 minute. Whisk in the milk and cook, stirring constantly, until the sauce boils, 1 minute. Remove from heat and stir in the cheese until melted. Blend in the cayenne and nutmeg. Whisk in the yolks one at a time. Set aside. (The recipe can be made to this point up to 1 day ahead. Cover with plastic wrap and refrigerate.)
In a clean bowl, beat the egg whites with the salt until stiff (but not dry) peaks form. Stir 1/4 of the egg whites into the cheese sauce to loosen it. Gently fold in the remaining egg whites. Spoon into the ramekins.
Bake until puffed and browned, 40 minutes for a 16-ounce soufflé, 20 minutes for two smaller ones. Serve immediately.
Mushroom Pancetta Crostini (Serves 6-8)
Ingredients
One baguette, sliced thin on the bias
One tablespoon olive oil
4 ounces pancetta, chopped fine
12 ounces shiitake mushrooms, sliced thin
One small shallot shallot, peeled and finely diced
One teaspoon fresh chopped thyme
Directions
Spread baguette slices on a cookie sheet and bake at 375 degrees until golden brown.
Sauté pancetta in olive oil until fat is rendered. Add mushrooms and shallots, sautéing until cooked through. Add thyme and fresh pepper. Spoon mushroom mixture onto baguette slices and serve garnished with more thyme.
~Hannah
Saturday, August 6, 2011
Catching Up: Making A House Our Home
So as you know, Mark and I moved to Santa Clara from Sacramento this past April. Despite new jobs and crazy schedules I did manage to get our house organized and furniture placed, etc. The one thing I (or Mark for that matter) did not get to was hanging any pictures! We have been living with empty walls and stacks of pictures leaning against them for months.
Over the July 4th weekend we visited some of our good friends who also recently moved to a new city. Now they moved several weeks after us into a large three story town home and they already had every picture hung and every nook of their cute home decorated! I decided it was quite pathetic that I couldn't hang my few pictures to help finish my tiny one bedroom apartment. So one day while Mark was working I had a picture hanging frenzy. Here are a few shots from my day (Sorry for the poor cell phone quality):
It was a small change but we now have a home that feels cozy and finished. I love it!
~Hannah
Friday, July 29, 2011
Catching Up: Oh Baby!
I have been having so much fun lately in baby world. (Don't worry, I'm not having one!) In my circle of friends however, "baby" has definitely been in the air. One project I completed was a baby quilt for a good friend. It is so neat seeing her go through this phase of life. I met mommy to be in high school, and actually knew her husband from grade school. This couple has always held a special place in my heart and it will be so exciting to see their baby when she finally arrives!
Now baby "Addy" has a black and white nursery with all shades of pink in it. I kind of ran with the pink idea when making her quilt. The first step was choosing the fabric. I tried to choose an array of pinks with varying patterns and "visual weight." It was also a little challenging to keep the shades of pink clean. So many pink fabrics have a brownish undertone that makes them look a little dingy when placed next to something bright. Here were my choices:
The next step was cutting 8 circles out of each pattern. (If you ever make this quilt yourself I HIGHLY recommend getting this rotary cutting tool. It is a life saver when cutting circles!). I also cut out 48 white squares from a super soft Kona cotton :)
After cutting and ironing the pieces I stitched each circle to it's own square with a zig zag stitch. It does take some practice sewing in a circle!
Before assembling the blocks I made a pattern and numbered the squares to keep the pattern straight.
As each row was completed, the quilt really started to come together. This is where it got exciting!
I then stitched the rows together to finish the front of the quilt!
The next step was embroidering baby Adella's name on one circle.
After adding the batting and soft flannel backing, I finished it off with a black border. Here are a few pictures of the final product in the adorable nursery!
If you are thinking about making one of these I found the pattern on the blog Bijou Lovely. It is a perfect tutorial for beginners. She really explains things step by step even down to pinning techniques!
I had so much fun making this quilt and cannot wait for the next time I get to make this for another friend. (And ONE day myself!)
~Hannah
Subscribe to:
Posts (Atom)